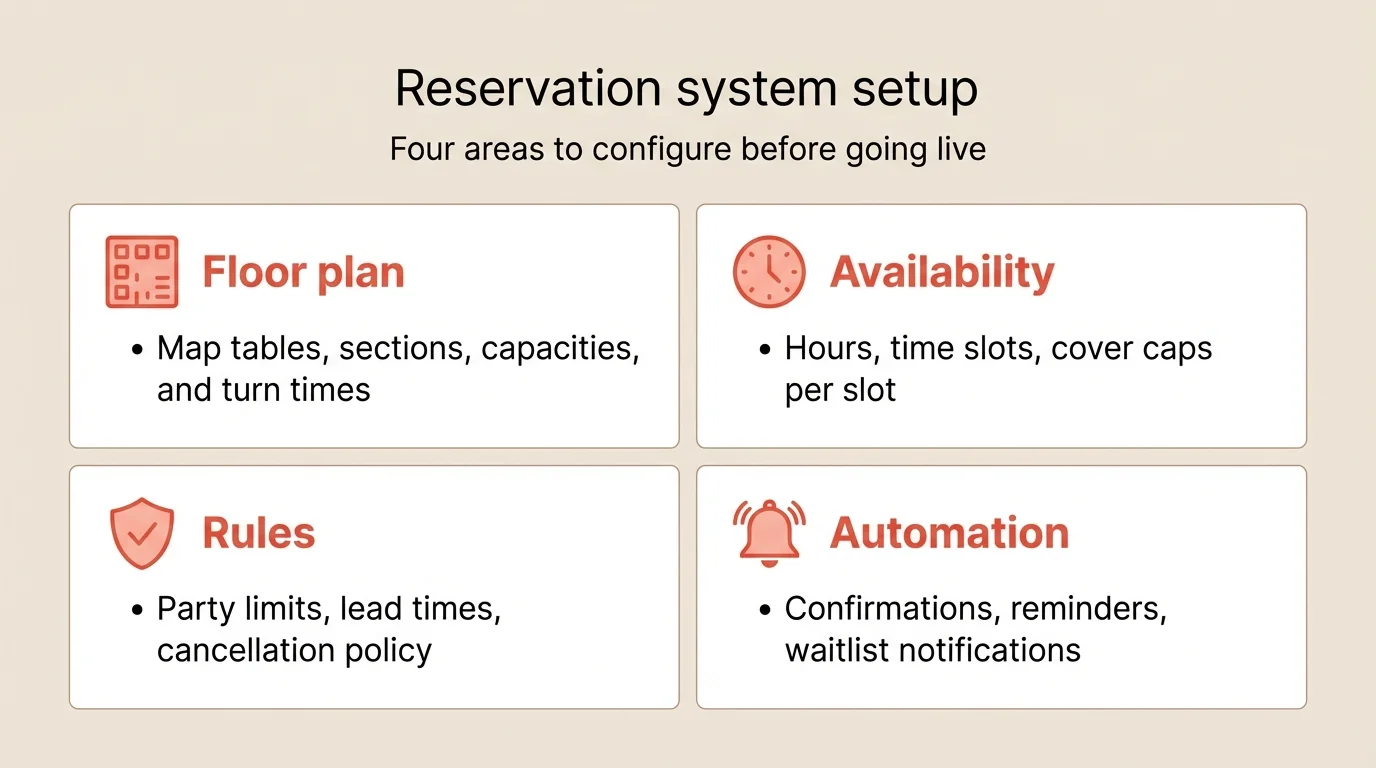
To set up a restaurant reservation system, choose software that fits your budget, enter your floor plan, configure availability rules, and embed the booking widget on your website. Most restaurants complete the full setup in under half a day and see immediate improvements in booking volume and organization.
Running reservations through a notebook, sticky notes, or phone-only is costing you money. Restaurants using dedicated reservation systems report 20 to 40% more bookings, significantly fewer double bookings, and dramatically lower no-show rates thanks to automated reminders. If you’re still managing reservations manually, you’re leaving tables empty that could be filled.

Key takeaways
- Main solution: Choose a system, enter your floor plan, set rules, embed widget, train staff
- Expected result: 20-40% more bookings, near-zero double bookings, 30-50% fewer no-shows
- Time to implement: 2-4 hours for setup, 1-2 hours for staff training
- Cost: Free to $150/month for most independent restaurants
Before you start
Gather this information before creating your account:
- Floor plan details: Number of tables, seats per table, sections (indoor, patio, bar, private)
- Service schedule: Operating days, meal periods, first and last seating times
- Booking policies: Maximum party size for online booking, cancellation policy, deposit requirements
- Current reservation volume: Average bookings per day to estimate the right plan tier
- Website access: Login credentials or contact for whoever manages your site
Having this ready makes setup faster and avoids back-and-forth later.
Step 1: Choose the right system
The reservation system market has options at every price point. Focus on what matters for your operation.
What to do:
- Define your must-have features (online booking, reminders, floor plan)
- Set your budget (monthly cost you can justify)
- Test 2-3 systems with free trials
- Check integration with your existing tools (POS, website, Google)
- Read reviews from restaurants similar to yours
Feature comparison by restaurant type:
| Feature | Casual dining | Fine dining | Cafe/bar |
|---|---|---|---|
| Online booking widget | Must have | Must have | Nice to have |
| Floor plan management | Nice to have | Must have | Optional |
| Guest profiles | Nice to have | Must have | Optional |
| Automated reminders | Must have | Must have | Must have |
| Deposits/prepayment | Optional | Must have | Optional |
| Google Reserve | Must have | Nice to have | Nice to have |
| POS integration | Nice to have | Nice to have | Optional |
| Waitlist management | Nice to have | Optional | Must have |
Pricing models to understand:
| Model | How it works | Best for |
|---|---|---|
| Flat monthly fee | Fixed price, unlimited bookings | Predictable costs, high volume |
| Per-cover fee | Monthly base + charge per booking | Low volume, testing the waters |
| Free tier | Limited bookings per month, free | Very small operations |
| Commission | Percentage of revenue | Typically third-party marketplaces |
Per-cover fees seem cheap at first but add up. A restaurant doing 500 reservations per month at $1 per cover pays $6,000 per year just in cover fees on top of subscription costs.
For a detailed system comparison, see how to choose a booking system.
Step 2: Enter your floor plan
Your floor plan is the foundation of accurate availability. Get this right and everything else flows naturally.
What to do:
- Map every table with its capacity (minimum and maximum guests)
- Organize tables into sections (indoor, patio, bar, private dining)
- Mark tables that can be combined for larger parties
- Set table turn times by meal period
- Define any table-specific rules (wheelchair accessible, VIP-only)
Table setup details:
| Table attribute | Why it matters |
|---|---|
| Min/max capacity | Prevents seating 2 guests at a 6-top during peak times |
| Section assignment | Allows section-specific availability and staffing |
| Combinable tables | Handles large parties without manual juggling |
| Turn time | Determines how many seatings per table per service |
| Priority | Controls which tables fill first for small parties |
Turn time by restaurant type:
| Type | Average turn time | Notes |
|---|---|---|
| Fast casual | 45-60 min | Quick service, high volume |
| Casual dining | 60-90 min | Standard meal experience |
| Upscale casual | 90-120 min | Longer courses, cocktails |
| Fine dining | 120-180 min | Multi-course, sommelier service |
Set turn times conservatively at first. It’s easier to add a seating than to rush guests out because you overestimated turnover. For deeper guidance, see table turnover rate.
Step 3: Configure availability and rules
This is where you translate your operational knowledge into system settings.
What to do:
- Set operating hours for each day and meal period
- Define time slot intervals (15, 30, or 60 minutes)
- Set maximum covers per time slot
- Configure party size limits for online booking
- Set lead time rules (minimum and maximum advance booking)
- Add blackout dates or special hours for holidays
Availability settings:
| Setting | Recommended default | Adjust based on |
|---|---|---|
| Slot interval | 30 minutes | Kitchen capacity and dining style |
| Max covers per slot | 70-80% of capacity | Kitchen throughput, not seating capacity |
| Max online party size | 6-8 guests | Larger groups need direct contact |
| Min lead time | 1-2 hours | Kitchen prep requirements |
| Max lead time | 30-60 days | Far-out bookings have higher no-show rates |
| Buffer between seatings | 15 minutes | Bussing and reset time |
Why cap below full capacity: If your dining room seats 80 but your kitchen plates 50 covers per hour, your availability cap should be based on 50, not 80. Overbooking relative to kitchen capacity destroys guest experience. See capacity planning for the full approach.
Step 4: Set up automated communications
Automated messages reduce no-shows and improve guest experience with zero ongoing effort.
What to do:
- Enable instant booking confirmation (email and/or SMS)
- Set up 24-hour-before reminder with confirm/cancel link
- Customize message templates with your restaurant’s voice
- Test the full sequence on your own phone
Message sequence:
| Timing | Message | Channel |
|---|---|---|
| Instant | Booking confirmation with details | Email + SMS |
| 24 hours before | Reminder with confirm/modify/cancel links | SMS preferred |
| Post-visit (optional) | Thank you with rebooking link |
SMS vs. email: SMS gets 98% open rates vs. 20% for email. For reminders, SMS is significantly more effective. Use email for detailed confirmations and marketing follow-ups.
Automated reminders alone reduce no-shows by 30 to 50%. For the complete no-show reduction strategy, see how to reduce no-shows.
Step 5: Install the booking widget
The widget is how guests find and complete online reservations on your website.
What to do:
- Copy the embed code from your reservation system
- Add it to your homepage above the fold
- Add a “Reserve” button to your site navigation
- Place the widget on your menu and contact pages too
- Test on mobile, tablet, and desktop
Where to place it:
- Homepage hero area (highest visibility)
- Fixed navigation bar (visible on every page)
- Menu page (guests decide to book while browsing)
- Contact page (alongside phone and address)
- As a floating button on mobile
For detailed widget placement strategy, see how to set up online booking.
Step 6: Train your team
A system is only as good as the people using it. Invest time in training before launch.
What to do:
- Schedule a 30-minute training session for all FOH staff
- Cover: checking tonight’s reservations, seating a walk-in, entering a phone booking
- Practice: modifying a reservation, handling a no-show, managing the waitlist
- Assign one person as the system admin for troubleshooting
- Print a one-page quick reference card for the host stand
Training priorities by role:
| Role | Must know | Nice to know |
|---|---|---|
| Host | View reservations, seat guests, manage walk-ins, enter phone bookings | Guest profiles, VIP alerts |
| Server | View table assignments, check guest notes | Update guest preferences |
| Manager | Override settings, run reports, handle complaints | Analytics, marketing |
| Owner | Reports, trends, ROI | Full system administration |
Common staff concerns:
- “What if the system goes down?” Have a paper backup plan for the first month. Most cloud systems have 99.9% uptime, but staff need confidence
- “Will this take longer than the notebook?” The first week, yes. After that, it’s faster and far more accurate
- “Do I have to use it for every reservation?” Yes. Mixed systems (some in the app, some on paper) cause double bookings
Step 7: Go live and monitor
Launch during a quieter period, not your busiest night.
What to do:
- Pick a Tuesday or Wednesday to go live
- Run the system alongside your old process for 2-3 days
- Monitor for double bookings, missed confirmations, or confused staff
- Collect feedback from hosts and servers after each service
- Adjust settings based on real-world performance
First week checklist:
- All phone reservations entered into the system
- Confirmation emails arriving promptly
- Reminders sending at the correct time
- No double bookings
- Staff can handle basic operations without help
- Walk-ins are being logged
- Availability updates correctly after each booking
When to adjust: If you see any of these in the first week, act immediately:
- Guests arriving for overlapping reservations (turn time too short)
- Kitchen overwhelmed at certain times (cover cap too high)
- Guests complaining about no available times (cap too low or slots too wide)
Common mistakes to avoid
Setting and forgetting
Your first configuration won’t be perfect. Review your settings after week one, month one, and quarterly. Service patterns change with seasons, menu changes, and staffing.
Running parallel systems
Once you go live, commit. If some bookings are in the system and others on paper, you will get double bookings. Enter every reservation into the system, including phone calls and walk-in requests.
Ignoring the data
Your reservation system generates valuable data: peak times, popular time slots, no-show patterns, average party size. Review this monthly and use it to optimize your operation. See RevPASH for using reservation data to maximize revenue.
Skipping staff training
Handing staff a tablet and saying “figure it out” leads to workarounds, errors, and resistance. Thirty minutes of structured training prevents weeks of frustration.
Over-complicating the setup
Start with basic settings and add complexity as you learn. Don’t configure 15 different table types and 8 booking rules on day one. Get the basics right, then optimize.
How to measure success
Track these metrics for the first month:
| Metric | Before system | Target after 30 days | How to track |
|---|---|---|---|
| Double bookings per week | 2-5 | 0 | Incident log |
| No-show rate | 10-20% | Under 8% | System reporting |
| Online booking % | 0% | 40-60% of total | Booking source report |
| Phone time on reservations | 30-60 min/day | -50% | Staff estimate |
| Staff satisfaction | Variable | Positive | Quick survey after week 2 |
Most restaurants see positive ROI within the first month from reduced no-shows and increased booking volume alone.
Tools that help
A good reservation system includes everything in this guide. Key capabilities to look for:
Visual floor plan for mapping tables and managing seating in real time.
Online booking widget that embeds on your website with real-time availability.
Automated reminders via SMS and email to reduce no-shows.
Guest profiles that build automatically from bookings and support staff notes.
Reporting on booking volume, sources, no-shows, and trends.
Google Reserve integration for capturing search-driven bookings.
Resos includes all of these features with a free tier for up to 25 bookings per month and paid plans from $24/month with no per-cover fees.
Frequently Asked Questions
What is the best restaurant reservation system?
How much does a restaurant reservation system cost?
Can I use a reservation system without a website?
How long does it take to set up a reservation system?
Should I keep taking phone reservations after switching to an online system?
The bottom line
Setting up a reservation system is a one-day project that pays off every day after. Choose a system that fits your budget, enter your floor plan accurately, set conservative availability caps, and train your team. Go live on a quiet night, monitor closely for the first week, and adjust based on what you see.
The biggest mistake is waiting. Every week you manage reservations manually is a week of lost bookings, preventable no-shows, and wasted staff time.
Related guides: How to choose a booking system | How to set up online booking | How to reduce no-shows | Table turnover rate